

How To Get Riptide Destiny 2
| | Non what you lot were looking for? |
|---|---|
| Run into Riptide or Riptide (Ornament). |
| Riptide (Mission) | |
|---|---|
 | |
| Information | |
| Type | Story Mission |
| Number | vii |
| Location | Siren'due south Lookout man, Titan |
| Level | 4 |
| Recommended Power | 50 |
| Clarification | Without power, Zavala'southward resistance has hit a wall. Travel deeper into the Arcology and aid them past it. |
| Enemy Types | Fallen, Hive |
| Prerequisite | Completion of Story Mission Hope. |
| Previous | Hope |
| Next | Utopia |
| Rewards | |

Riptide is a Story Mission of The Cerise State of war campaign. It begins immediately upon completion of the previous mission, Hope.
Walkthrough
You start the mission on the landing pad in Siren's Watch - drop downwardly and run towards the two towers connecting this expanse to The Rig.
Entering the new Sector, you volition come up beyond some Hive Acolytes fighting Fallen Dregs and Vandals. Eliminate them all, preferably starting with the Acolytes, and proceed.
Side by side up, you will come across a bridge. The Fallen are assaulting the span, but a new enemy, a Hive Shrieker, is keeping them at bay. Take the Fallen out and the Shrieker will focus on y'all. While yous battle this formidable enemy, stick to cover and just show yourself when it's not shooting. Get a few shots in its glowing core, so duck to cover once more than earlier it manages to land a striking on you. Echo this until the Shrieker is destroyed.
With the Shrieker gone, you are free to cross the bridge and close the distance separating you lot from the Hive forces on the other side. At that place will be a Knight and a group of Acolytes to deal with, but if you have downed a Shrieker, they should not be a problem. Once you have dealt with the basis forces, head into the construction with the sunburst logo above the bridge and make your way through some Hive gunk - y'all will eventually cross over into Tidal Anchor.
Continue in heed that yous are now inbound a Restricted Zone, and so tread carefully. Y'all will come across another disharmonize betwixt the Hive and the Fallen. Neutralize both sides and look out the window to see Fallen reinforcements being dropped from a ship. Fix to deadfall some Exploder Shanks and some Dregs. Shoot the Shanks first and they may damage other units around them.
Then, proceed forward and deal with the Fallen Helm in your way and his two Vandal henchmen. With them gone, access the marked console to endeavour and restore power to the base. Unfortunately, two of the converters refused to start, so you will take to get to them and start them manually.
Move through the newly-opened door and navigate the stairwell you will reach. And so, slow down. There will be some motion-activated traps for yous to bargain with. It's all-time to shoot them from a distance. Getting shut to them will actuate them and you will exist slowed down and damaged at the same time unless you can shoot the trap orbs out of the air before they detonate.
Once y'all've dealt with the traps, push button on to observe a Dreg and a Wretch in the next room. Eliminate them and caput down the next stairwell. At the bottom of the stairwell, have out the Exploder Shanks and Dregs that you will find. Then, head into the windowed corridor. Within, immediately plow left to find some more Fallen for you lot to battle.
With them dealt with, move towards the laser-filled corridor. Shoot one of the light amplification by stimulated emission of radiation traps and the unabridged net will detonate, so brand sure to do so from a distance. Then, go on through the corridor and driblet down through the circular hole you fill find. Brand certain to spring just before you land to avoid the fall damage.
Once below the chief rig, wait for any Shanks in the distance and bargain with them first. There will be some new units chosen Tracer Shanks also, so watch out for sniper burn. And then, focus on the group of Dregs and the Vandal.
Moving on, step through the open hatch on your left. Ignore the worm yous will come up beyond - it's not a threat - instead, watch out for motion trap. Take it down from a condom distance and move on. Not much further, you're presented with a choice - to take the right gantry or the left one. Choose the right and fight your way forwards, then plough left and take out the Tracer Shank waiting for y'all there.
Pressing on, you will reach a bridge with some Fallen forces on the far side. Expect some Shanks, Dregs, Vandals, and a Captain. Take out the Shanks first and make certain y'all do it from a distance. Otherwise, you will take to dodge their attacks up close and this could easily result in you plummeting to the methyl hydride sea below. With the Shanks gone, set on the position held by the Fallen, making the closest targets your priority.
As you reach the far side of the bridge, a group of Hive will assault the Captain if you haven't dropped him even so. Ignore the Acolytes and the Knight for now and focus on taking out the new Hive units, Cursed Thralls, instead. They will explode when near you, so keep your distance. Then, mop up the residue of the Hive you lot see.
Moving on, you volition come beyond a 2nd bridge. When y'all are about halfway through information technology, you volition be ambushed by some Hive forces. Back up if you take to and keep your distance from these foes. There will exist some regular and some Cursed Thralls. Make the exploding kind your priority, as their explosions tin can thin out the rest of the forces. Deal with any regular Thralls assaulting your position and move on to tackle a group of Acolytes and a Knight. Do you all-time to contrivance the Acolytes' fire grenades, as they will practice some damage over fourth dimension.
After y'all make your way through Tower 02, you will come up across a jumping claiming. Brand sure you sympathize your restrictions and time your jumps correctly to avoid taking a dip in the methane below. Kickoff, leap from the roof of the covered span y'all're on towards the converter tower ahead. So, carefully make your manner upwardly the destroyed catwalks and enter the tower. Within, you volition see that the converter is jammed by huge amounts of Hive matter. Destroy information technology and information technology volition start working again.
Exit out of the elevation of this tower and you volition meet a battered cable bridge to your right. In that location are some dangerous-looking platforms hanging from information technology and leading towards the side by side tower. Bound across them and land at the next rig to find a Knight and a group of Acolytes. Take them out and expect for the next unsafe crossing to the left of where y'all came from. The bridge will stop halfway, and then you lot will have to jump up towards the catwalk, then take a correct and make a couple more jumps to reach the next tower.
A group of Acolytes and a Knight will see you there. Bargain with them and head into the tower. Drop one level down and destroy the Hive affair blocking the second converter. Unfortunately, this didn't restore power, and so you will take to locate a circuit breaker to reset.
Your adjacent objective is in the center tower. Proceed one more level downwards and go to the outside of the converter tower. Look to your right and you volition meet a ruined bridge that looks just out of your jump'southward achieve. Fortunately, information technology is not, so jump up to the offset platform of it and brand your manner forward. On the other end of it, jump to the gantry that'south a little to the left and up from the bridge. Time your jumps carefully, as you tin hands find yourself swimming in methyl hydride otherwise.
Head upwards the brusk stairwell and you will find some new Hive units, Wizards, and some Acolytes. Try to accept out the Acolytes first and so focus on the Wizards, free of other distractions. If you find the battle a flake also hard, don't hesitate to apply your Super, Power Weapon, and any other abilities, as this is the last encounter for this mission.
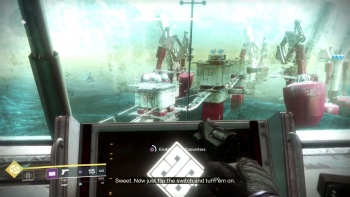
So, detect the console covered by Hive matter. Clear it upwards and flip the switch to get the power station dorsum online, complete the mission, and be transported to Sloane's location within Siren's Sentry.
Reward
None
Related Manufactures
- Story Missions
| Story Missions | |
|---|---|
| Forsaken | Last Call • High Plains Blues • Scorned • The Rider • The Trickster • The Mad Bomber • The Hangman • The Mindbender • The Rifleman • The Machinist • Nothing Left to Say |
| Shadowkeep | A Mysterious Disturbance • In Search of Answers • Ghosts of Our By • The Carmine Keep • In the Deep • The Nightmare Cometh • Across |
| Beyond Light | Darkness'southward Doorstep • The New Kell • Rise Resistance • A Link to the Future • The Warrior • The Technocrat • The Kell of Darkness |
Source: https://d2.destinygamewiki.com/wiki/Riptide_(Mission)
0 Response to "How To Get Riptide Destiny 2"
Post a Comment